12/5/15

Garden Solutions - December 2015

The month of December brings the holiday season and warm thoughts of family, friends and community. I would like to say “Thank You” and wish you and yours a “Blessed Holiday Season” with all the best in the New Year!

Fall will turn into winter this month. It may not always be the most comfortable time to be planting anything in your landscape, but it is a great time for the plants. Trees and shrubs are completely dormant now, so the concept of transplant shock does not apply. 

Trimming or pruning of some of your trees and shrubs can be done now. Basically, it breaks down like this, if the tree or shrub flowers before the 1st of June don’t touch it now. If it flowers after the 1st of June, you can safely cut it now. Resist the urge to cut back everything. Most perennials benefit from adding a layer of mulch or dead leaves. If you had any fungus or disease problems in an area, go ahead and cut back the plants in that area and rake up the debris. Keep your ornamental grasses up until mid-March.

Roses: a winter “hair-cut” can be given, but don’t cut them back all the way. Some winters can be so cold that the roses could get winter die-back which would need to be removed in the spring anyway, so plan on your heaviest rose trimming in spring in early April. Apply a thick layer (10-12”) of mulch at the base of your roses now.

Plants get “chapped lips” too. Cold, dry winter winds and bright winter sun make our skin chapped and unhealthy. Those winds have a devastatingly similar effect on your plants, which are out in the winds all winter. No wonder your evergreens don’t look so great come spring. This drying effect is called desiccation. To fight desiccation, choose the right plants for windy, dry areas. Make sure to water your evergreens well through early December, before the ground freezes. Mulch your plants for winter to retain soil moisture as well as soil temperature. Use an anti-desiccant like Wilt Stop by Bonide. These products coat leaves and needles to slow down the loss of moisture.

Here are a few tips on winter houseplant care. When the heat goes on and the daylight becomes shorter, it may be necessary to move the plants to a different place in the home and to give them different treatment from that given during the summer. Flowering plants need at least half a day of direct sunlight. Cacti and many succulents require a sunny location, and crotons need direct sun to maintain the decorative color. The ideal temperatures for foliage plants are 68-70 degrees during the day and slightly lower at night. Remember, windowsill locations are much colder during the winter and plants may need to be moved to prevent them from getting chilled. The amount of water the houseplants need declines during winter, so increase the amount of time between watering. Reduce fertilizing as well.

Some of the plants in your landscape can help you decorate for the Christmas season as you prune them for next year. Holly and Boxwood can be trimmed now with some of the cuttings used to accent wreaths or live indoor plants. Additionally, some of the growth of evergreens such as White Pine, Norway Spruce, even some of the seed heads of ornamental grasses can be used to make a harvest wreath or basket for your front door or porch. Talk about recycling! After Christmas, you can take them to your compost bin for future fertilizer! Along with these Holiday tips, here are a few other ideas for the month:

·                     Use caution when spreading salt or calcium on ice or snow packed walks or driveways. Salt can damage lawns and plantings, calcium is much safer to use. Be sure to designate areas to for piling snow from plowing in advance to prevent damage to trees, shrubs and lawns.

·                     Continue to feed our fine feathered friends and place heated birdbaths with fresh water out for them.

Again, I wish you and your family a very Blessed Christmas season. Let’s get to work on planning that beautiful garden scene for next year!


See you in the Garden…………..

Sandi Hillermann Mcdonald


11/6/15

Garden Solutions - November 2015

        Our fall season has been very dry. Even though the foliage on trees and shrubs is gone, the roots need moisture to build up spring buds and increase root growth. The amount of water needed may be less than when the foliage was on the plants, but water is still very important.
It is sad to watch the garden fading into winter, but at least we don’t have to say goodbye. Spring will return, as naturally as the sun will rise tomorrow morning. All we have to do is get the garden prepped so that it can rest until its renewal a few months from now. Here is a to-do list that will help you prepare your garden for its winter’s nap.
        Clean out and cut back. Loads of dead leaves and rotten stalks on plants can harbor disease, even through the winter season. But, don’t cut all your plants back to the ground, and don’t pick up every leaf. It is a great treat to leave some seed heads on plants for the winter birds and on ornamental grasses for their winter art in the garden.  Leaving some plant stalks to protect the crowns of tender perennials is also beneficial.
        Cover up. Mulch is the best winter protection for your plants. Wood mulch is the most common. Wait until the ground has frozen slightly, usually around Thanksgiving for us, to ensure the plants are in their dormancy state. If the snow falls before you get the opportunity to get the job done, mulch over the snow. Some woody perennials and shrubs may benefit from soil mounded around the base. These plants, in our area include, roses, crape myrtle, butterfly bushes to name a few. Tender shrubs may need to be screened or wrapped with burlap or something similar, not plastic.
        Dig in. There is still time to plant some garden jewels this month. Trees, shrubs and plants that have a root ball larger than a gallon can be put into the ground. In addition, now is the time to plant those spring beauties we call bulbs. To enjoy the beauty and bright colors of tulips, hyacinths, and daffodils as well as crocus and alliums in spring, plant them NOW. Bulbs need 10-12 weeks of cold soil temperatures. Therefore, in our area you can plant up to the Christmas season, as long as frost hasn’t built up in the soil. 
        Write down. You will find that a garden log or journal will be very helpful next spring when you’re trying to identify those first tentative green shoots and wondering whether you divided that Hosta plant last fall or should you do it now. Draw a basic diagram of each bed, noting the plants and adding photos where you can. A little extra effort with your journal will pay off next spring.
        Here are a few other duties to think about this month of November. Continue mowing lawn grasses as long as they keep growing, 3” is a good height. Apply Winterizer fertilizer to lawns to strengthen plant stems and roots for winter growth and early spring green up.
        Cover garden ponds with bird or pond netting to prevent leaves from fouling the water. Oxygen depletion from rotting organic matter can cause a winterkill of pond fish. Take steps to prevent garden ponds from freezing solid in winter. Using a floating garden heater in the pond will lessen the chance of ice damage.
        Set up bird feeders. Birds also appreciate a source of unfrozen drinking water during the winter. Use one of the many styles of birdbath heaters or heated birdbaths available at garden centers. When feeding the birds, set up a variety of feeder types to get the best assortment of birds to come to your yard. Tube feeders are good for songbirds, platform feeders are good for cardinals and larger birds, and suet is a great source of fat and energy for woodpeckers and all bird types.
        Enjoy the antics of wildlife and the beauty of plant art in the garden during this upcoming winter season. I will give you more to look forward to in the winter garden in December. Until then, Happy Thanksgiving to all and enjoy the outdoors as much as possible.


See you in the garden,
Sandi Hillermann McDonald


10/7/15

Garden Solutions - October 2015

            This month in “Garden Solutions,” I am going to focus on trees and pumpkins. Quite a different combination, but both need attention this time of year.


The Many Benefits of Planting Trees

            Most often, we plant trees to provide shade and add beauty to our landscape. These are great benefits, but trees also provide many less obvious benefits. Consider all the benefits listed below and remember fall is the perfect time to plant trees for an increased success rate next spring.

·    Trees are perfect for planting as living memorials, to remind us of loved ones, or to commemorate significant events in our lives.

·    Even though you may own the trees on your property, your neighborhood may benefit from them as well. Through careful planning, trees can be an asset to your entire community.

·    Tree lined streets have a traffic calming effect, traffic moves more slowly and safely.

·    Trees can be placed to screen unwanted views or noise from busy highways.

·    Trees improve our air quality by filtering harmful dust and pollutants such as ozone, carbon monoxide, and sulfur dioxide from the air we breathe.

·    Trees give off oxygen that we need to breathe.

·    Trees reduce the amount of storm water runoff, which reduces erosion and pollution in our waterways and may reduce the effects of flooding.

·    Many species of wildlife depend on trees for habitat. Trees provide food, protection, and homes for many birds and mammals.

·    Well-placed trees can reduce your cooling costs in the summer by shading the south and west sides of your home. If deciduous trees are used, they will allow the sun to pass through and warm your home in the winter.

·    Evergreen trees on the north side of your home and shrubs around the foundation of your home can act as a windbreak to reduce the cooling effects of winter winds.

·    The value of a well landscaped home with mature healthy trees can be as much as 10% higher than a similar home with no or little landscaping. (Topping trees will reduce their value.)


            Now, let’s change the focus. This is the month for HALLOWEEN!!! What a great and fun time to decorate and enjoy the season with the children of the neighborhood. Here are “Tips for Selecting and Preserving Your Pumpkin.”


            When selecting a pumpkin for a jack-o-lantern, choose one that does not have any bruises. Check for discoloration and soft spots. The size will not matter, however, to most children and some adults, bigger is better. You can always enlarge your pattern; shrinking a pattern can make the detail work too difficult.

            Pumpkins that are more flat and do not roll well work the best. Look for pumpkins with a sturdy stem; this is the sign of a healthy pumpkin. Do not lift or carry the pumpkin by the stem, this can damage it and make it age faster. Check the bottom of the pumpkin to see if the base is damaged. Sometimes the bottom of pumpkins is thin and can get punctured. Then, bad things can grow in them. If the pumpkin feels heavy and sloshes, put it back. I once opened a pumpkin to find the insides had rotted and there was a slimy, smelly, liquid goo left behind.


Preserving and Firming Up a Pumpkin

            There are ways to help keep your pumpkin fresher and firmer. If you place a pumpkin in a washtub of cold water, it will absorb the water and become very firm. Cut open the top of the pumpkin and clean out all the seeds. Fill a washtub, sink or large bucket with cold water, and soak the pumpkin in the cold water. If you have fine detail work to do, you may want to let your pumpkin soak overnight. This will firm up the pumpkin flesh and allow you to do carving that is more intricate. You can add a small amount of unscented Clorox bleach in the water to prevent premature mold and bacteria growth.

            Once you have carved your pumpkin, you can add a thin amount of petroleum jelly on the exposed cut edges. This will help seal moisture in the flesh of the pumpkin. If the pumpkin dries out, it will shrivel. You can try to revive it by soaking it in a bath of cold water for one to eight hours. Longer is better. Overnight will not hurt.

            You can prepare your pumpkins ahead of time and keep them fresh for a future party or gathering. Soak them first. Wrap them in plastic wrap to hold in the moisture and store them in the refrigerator (not the freezer). They will stay fresh this way for a very long time.

            Once you remove a wet pumpkin for display, you should immediately dry it off. This prevents mold from having a chance to grow.


Now, enjoy all that the month of October has to offer and I will…
See you in the garden.

Sandi Hillermann McDonald


9/17/15

Garden Solutions - September 2015


The Best Time of Year is NOW!!!

       When I was a kid, I loved summer---no school, warm sunshine and lots of fun and mischief to get into.  Now that I’m a Grandma, my thoughts on the seasons has also matured.  Over the years, I have come to enjoy all the offerings of fall.  The cool, crisp mornings that gives way to warm days and starry nights.  Fall color in Missouri is exceptional with the turning of leaves on trees-colors so vivid and alive that they jump out of the landscape.  Driving past fields of pumpkins gets the kids excited that Halloween candy is yet to come.  The treat of eating sweet grapes fresh off the vine and juicy apples plucked from the trees comes to mind.  And of course, fall sports begin soon.

       There is no better time of year than this abundant season to catch your bearings, reevaluate the year, enjoy the harvest and relax.  It is also the best time to take a few moments to invest in your home.  There are many simple tasks you can do now to help save yourself time in spring when you are twice as busy.

PLANT, PLANT, PLANT

       Fall in Missouri is the ideal time of year to plant all kinds of things from cool-season vegetables to turf grasses, and especially shrubs, evergreens and deciduous trees.  Yet, when it comes to planting, many gardeners only think of the spring.  Why is fall such an ideal time to plant?  First, the warm soil in the fall helps encourage root growth.  The plants roots continue to grow through our mild winters, and become well established by the spring.  This makes fall plantings much better equipped to handle our heat and drought once summer finally arrives.  In addition, our fall and spring rains help do all the work in establishing your plants so you don’t have too.  There are also fewer pests and disease problems to attack your plant while it is young.

       When fall arrives, I want to see bright oranges, vibrant yellows, and fiery reds.  These fall colors bring life back to our landscapes after the summer sun has faded most of the blooms.  The natural turning of leaves into their disguised color of glory brings a new energy to our yards and awakens our senses.  Right now, you can find selections of trees and shrubs especially bred for fall color.  There is no reason to have hum-drum containers during fall when there are Garden Mums and Fall/Winter Pansies to replace our burnt out summer annuals.  Fall cool crops known as Fall Magic are also great additions to beautiful fall containers.

       Home decorating is great fun also to add pumpkins, corn stalks, gourds and other harvest items to the landscape or porch décor.

       In addition, don’t forget fall bulbs.  Now you will find the best selection, and you have till Christmas to get them into the ground for spring blooming.  Bulbs need 10 weeks of cold weather to create their magnificent spring show.  Many varieties and colors are popping up in this category of plants as well.  I will spend more time on bulbs in October.

THE POST SEASON WRAP UP

One of the best-kept secrets to the most lavish landscapes is autumn restoration.  Just a few garden chores done in the fall will lead to spring and summer pay-offs that are well worth the work.  Things to do now include:

Pull Weeds:  Clean up your yard by pulling weeds.  Then apply a pre-emergent such as Preen containing Trifluran.  This will keep your yard looking nice and weed free for months to come.

Fertilize:  It is important to fertilize your evergreens and conifers at this time because their root systems continue to grow throughout the late fall and even into the winter till ground frost appears.  An application of Osmocote or plants spikes is ideal for this task.  The plants take up these nutrients and are ready to explode when the spring growing season arrives.

Prepare Your Lawn:  Were you disappointed in your lawn this year?  Well, now is the time to prepare your lawn for next spring!  Aerate and thatch it if the soil is compacted.  This will allow the soil to drain better and give it much needed oxygen to the roots.  Seeding can be done as well as fertilizing.  Seeding in early fall will give the roots plenty of time to become established before winter.  Fertilize with a winter type fertilizer to build nutrients up in the root system.  This will keep your lawn from going into the winter hungry and it will help it take off much faster next spring.


Enjoy the cool crisp air and I’ll………..see you in the Garden

Sandi Hillermann McDonald


8/7/15

Garden Solutions - August 2015

            Have you been paying any attention to the pleas for the care and addition of Pollination plants? The St Louis Zoo has a Pollinator Program, which opened this year. Looking to add Pollination plants to your landscape is a “trendy” and meaningful thing to consider. The “Million Pollinator Garden Challenge” is a campaign to register a million public and private gardens and landscapes to support pollinators. Pollinators are responsible for 1 out of 3 bites of food we take each day, and yet pollinators are at critical point in their own survival. Many reasons contribute to their recent decline. We know for certain, however, that more nectar and pollen sources provided by more flowering plants and trees will help improve their health and numbers. Increasing the number of pollinator-friendly gardens and landscapes will help revive the health of bees, butterflies, birds, bats and other pollinators across the country.

            Here's how you can help! From individuals, to schools, community groups, and businesses - everyone can make a difference! BEE Counted! Add a photo of your garden or landscape to the S.H.A.R.E map on the MPGC (Million Pollinator Garden Challenge) website at http://millionpollinatorgardens.org/. Anyone and any size garden can join in our campaign to reach 1 million sites for pollinators! Check it out and BEE counted!!

            Here are a few health benefits of enjoying the outdoors. To the non-gardener or hard-core athlete, gardening may seem like a sedentary activity, but it is not. Activities like carting mulch around in a wheelbarrow, digging in the soil, and all that bending and lifting involved in planting/weeding really does burn calories. Studies show that depending on the activity, gardening can burn between 250 and 500 calories per hour. For many people gardening is a creative outlet, for others it’s the change of scenery from the daily grind that makes a difference. Still others find that the satisfaction of reaping the rewards (those tasty fruits and vegetables, and beautiful flowers) of your efforts is what helps to reduce stress levels.

Here are tips for the heat and drought period of August:

Ÿ         Japanese beetles can be eliminated by trapping. Beetle traps are available and safe/organic to use.

Ÿ         Keep deadheading spent annual and perennial flowers for continued bloom.

Ÿ         Feed garden mums and asters for the last time.

Ÿ         Monitor plants for spider mite activity.

Ÿ         Soak shrubs periodically during dry spells with enough water to moisten the soil to a depth of 8-10 inches.

Ÿ         Prune to shape hedges for the last time this season.

Ÿ         Protect ripening fruits from birds by covering plants with bird netting, readily available at Garden Centers.

Ÿ         Pinch the growing tips of gourds once the adequate fruit set amount is achieved.

Ÿ         Broccoli, cabbage and cauliflower transplants should be set out for the fall garden. Also, sow seeds of lettuce, radish, beans, beets, spinach and turnips now. (Spinach may germinate better if the seeds are refrigerated.)


Time to go...  See you in the Garden!!

Sandi Hillermann McDonald


7/9/15

Garden Solutions - July 2015

            I, for one, cannot believe it is the first of July already. This year is really flying by. This is the month for picnics, vacations, family reunions, and for just enjoying the outdoors in general. One of the tasks to take care of this month is weeding. If you put a pre-emergent weed control product in your landscape beds in March or April, you are due for a second application now. There are two reasons for this. First, most of the pre-emergent products that are available to the homeowner have a short life span, up to 60 days. The second reason is due to all of the rain we have had. However, there are many benefits to the very adequate rainfalls this year. One of them is the ease with which some normally difficult weeds can be pulled. So take time to clean up your landscape beds and apply a pre-emergent as soon as possible.

            The long hot days of summer are stressful to every living creature, including all your plants. If you are tired of the endless task of keeping your plants watered, it is time to think about adding mulch to your beds. I know that hotter weather is just ahead, so do yourself and your plantings a huge favor and apply mulch. If you have beds that have never been mulched, add 3” around all annuals, perennials, roses, trees and shrubs. Top dress previously mulched beds with an additional inch of fresh mulch. Not only does mulch hold in moisture, relieving you of some of your watering tasks, it also keeps the soil cooler, so your plants will be less heat-stressed. An added bonus is that weed seeds have a difficult time germinating when buried in mulch, reducing the time you spend weeding. 

            One of the most common questions that we receive at this time of year is, “How much do I water my ______?” I will try to explain some basic guidelines here:

             Vegetables and Bedding Plants planted in the ground: established plants need at least one inch of water per week, more when bearing fruit. Check the soil around the plants, when it is dry one inch down, it’s time to water.


            Container Gardens and Hanging Baskets: check your containers every day for water. Either test the soil by touch or lift the pot. Most baskets and many containers will need to be watered once, or even twice a day, depending on the weather. I suggest you fertilize once a week.


            Perennials: newly planted perennials need daily watering until established, at least one to two weeks, depending on weather. After they show signs of new growth, apply a one inch per week rule.

            Trees and Shrubs: newly planted trees and shrubs should be watered every 4-5 days for the entire first year after planting, unless rainfall is abundant. Place the end of your hose next to the base of the plant and let the water trickle very slowly for about two hours. This will allow the root zone to become thoroughly saturated.

            Established Lawns: your lawn should be watered when the grass blades don’t bounce back after being walked on. One inch of water per week should keep your lawn green and healthy. It is best to water early in the morning, before the heat of the day. This keeps evaporation to a minimum, and allows plenty of time for the grass to dry before nightfall, which will help prevent fungus problems.

            Newly Seeded or Sodded Lawns: for better germination, I suggest you mulch grass seed with straw as soon as it is planted. Once seed has germinated or sod has been laid, they must not be allowed to dry out. Water daily with a sprinkler until there is good growth. Early morning is again the best time. Once established, go back to the one inch per week rule.

            Water Gardens: also require an occasional addition of water. Check your pond weekly and add water as needed. Water plants have variable depth requirements, so you need to keep the water levels consistent.

            So continue to enjoy your outdoor spaces and make relationships with your plants! They can give you so much in return!


See you in the Garden,

Sandi Hillermann McDonald


6/10/15

Garden Solutions - June 2015

            Although I’ve never been accused of being short on words, there is often this blank in my mind about where to start the article. This month I will begin with a reminder that June is National Perennial Gardening Month. Perennials are herbaceous plants that die back to the ground in the winter but return year after year to dazzle us with color.
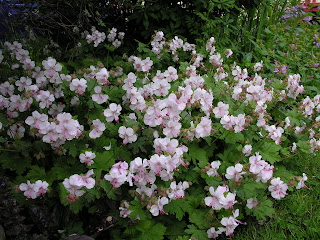
2015 Perennial Plant of the Year- Geranium xcantabrigiense, Biokovo - www.perennialplant.org

            Past and present Perennials of the Year (these are proven performance perennials that have been named since 1991) are usually great choices for anyone’s garden, as they are tried and true varieties.  Check the Perennial Plant Association website at http://www.perennialplant.org/ for perennial plants of the year since 1991 plus gardening tips.

My bigger focus this month will be on Pollinators and the importance they have in our society.  With fewer honeybees these days, it’s time to welcome alternative pollinators into your garden.  We’ve all heard the news: Populations of the honeybee are declining.  Factors such as habitat loss, pesticide use, and diseases have taken a toll on these heroes of the horticultural world.
The story that seldom gets attention is that for home gardeners there are plenty of native pollinators.  Roughly 4,000 species of bees are native to North America, including approximately 45 types of bumblebees.  Plus, many types of flies, certain wasps, and even butterflies and bats can act as pollinators.
By attracting a diversity of these beneficial visitors, pollination in your garden will improve.  Thus, yields of crops like tomatoes, squashes, cucumbers, peppers, and berries will increase. You can take three steps to welcome pollinators to your garden.
1.      PROVIDE NECTAR AND POLLEN RICH PLANTS, INCLUDING NATIVES AND HERBS.  The native pollinators in our region have co-evolved with the native plants, so use native wildflowers to draw them to your yard.  To maintain a population of pollinators, it is important to have plants in bloom all season long.  Even a small garden can support local pollinators.  Herbs can attract native pollinators and provide them with nourishment, too.  Native plants are easy to grow because they are adapted to our local climate and growing conditions and, once established, are fairly low-maintenance.
2.      ENSURE THAT POLLINATORS HAVE NEST SITES.  Many native pollinators nest underground, so have some open areas.  Bumblebees often make their homes in abandoned mouse and vole tunnels, while others prefer piles of rock.  Small bees may fly only a few hundred yards from their nest when foraging; large bees will travel a mile or more in search of food.  Mixing pollen and nectar plants among your fruit and vegetables will keep bees close to the plants you want them to pollinate.
3.      STOP USING PESTICIDES.  Pesticides are toxic to pollinators.  Pesticides should not be used on plants in bloom.  If you must, apply pesticides either near dark or very early in the morning.  At these times, insects are less active.  The best choice is to use natural pesticides and there are many available today.  We at Hillermann’s are turning our focus to natural controls in all areas.  We can help you.
  
Learn to enjoy your garden!
  Sandi Hillermann McDonald

5/8/15

Garden Solutions - May 2015


             “Coming home” at the end of a day can be even more important to us now than ever before. Times are changing and everyone is busier than before. So, enjoy daylight savings time and extend your living quarters to your yard and garden. Think of your outdoor spaces as an extension of your home. And in doing so, consider the floor, walls, and ceiling per se. Adding resting areas is easy to do…hang a hammock in a tree, set a bistro set in the perennial garden, or put benches in your hosta beds. Let the nature in your yard tickle your senses with the sounds of birds, smells of flowers, sound of running water, and splashes of color. Hardscapes can enhance your outdoor rooms by adding a “floor” to your area of enjoyment. 
While you are enjoying your yard, here are some items to put onto your gardening checklist. Begin planting summer annuals to add color and spice to the landscape, and don’t stop with just the flowerbeds. There are many new color introductions available in annuals that will prove to be very exciting.
Container gardening continues to be a trendy thing. The many choices, styles, shapes, and colors of containers make great accent pieces for inside or out. Let your imagination soar and express yourself. Use imaginative containers you pick up at flea markets and auction yards.  Learn to mix annuals and perennials for great combinations. Try hostas with begonias and impatiens….or hydrangeas with groundcovers. These containers can make great accent pieces on the front porch, the back deck, in a flowerbed, around the pool, or at the end of the driveway. In addition, you can rearrange them as often as you wish. No room for a vegetable garden? Try one in a container. You can enjoy fresh tomatoes easily this way
Plant summer bulbs now and fertilize with bone meal or bulb food. Pinch hardy garden mums back now and continue to do so until July 4 to insure proper fall blooming. Treat slugs in your garden with organic diatomaceous earth. This powder product is 100% safe, and is good for the treatment of slugs, ants, fleas and ticks outside, as well as roaches and ants indoors. This organic product is very safe to use and a good one to have on hand. “Natural Gardening” with eco-friendly products is a very “trendy” and SAFE thing to do for your own health as well as the environment. Check out the chemical-free options available to you today. Then sit back and watch your kids and pets enjoy the beautiful outdoors.

Other May tips include:
·         Do not remove spring bulb foliage too early or next year’s flower production will decline. Let the foliage die back naturally.
·         Plant hardy water lilies now.
·         Begin fertilizing annuals now and continue at regular intervals all season long.
·         Apply post-emergence broadleaf weed controls to the lawn now if needed.
·         Begin planting sweet corn, tomato plants, peppers and sweet potatoes as the soil warms up.
·         Keep asparagus harvested for continued spear production.
·         Remove rhubarb seed stalks as they appear.
·         Do not spray any fruits while in bloom, you may ruin the pollination process.
·         Birds eat many insects so attract them to your garden by providing good nesting habitats.
·         Herbs planted in average soils need no extra fertilizer. Too much may reduce flavor and pungency at harvest.
·         Watch for fireflies on warm nights. Both adults and larvae are important predators for plant damaging insects.

Until next month, enjoy connecting with nature and….see you in the garden….
Sandi Hillermann McDonald

4/10/15

Garden Solutions Article - April 2015

            April is the “opener” of spring. Grass greens up, trees leaf out, shrubs begin to bloom, perennials come back, and the birds continue to sing. This is truly my favorite time of year; the time of rebirth! The seasons move so fast, this is one that you really need to s-l-o-w d-o-w-n and enjoy every day.

            One of the bigger movements across the country this year is “Protecting the Pollinators”. Last year a huge push to “Save the Monarch Butterfly” was seen everywhere. A few years ago, the Honey Bee had been known as declining. Well, the decline of these most important Pollinators is still a strong concern. Therefore, we need to make ourselves aware of the push to save ALL pollinators. We can help with this push by being aware of your surroundings and eliminating the use of synthetic insecticide products, especially on blooming plants that are visited by pollinators. It you have an insect issue, talk to a representative at your local garden center about methods of controlling pests without harming pollinators. Our food supply depends on it.

            There is so much to talk about in April, I have made a short list of some of the more common, timely items that will need attention or guide you as we begin this most wonderful season of Spring!

·         When Crabapples are in bloom, hardy annuals can be planted.

·         Transplant trees, shrubs and perennials early in the month for best success.

·         Spots and bare patches in the lawn can still be over seeded if you did not apply a Crabgrass Preventer. During spring there are more issues to be aware of when seeding a lawn rather than in the fall.

·         Liquid weed control should be applied this month to control dandelions, henbit and other broadleaf weeds. New grass from seed MUST be mowed 3 times to make it strong enough to withstand weed chemicals.

·         Prune spring flowering shrubs after they finish blooming.

·         Start cucumber, squash, cantaloupe and watermelon seeds indoors this month.

·         Termites begin swarming. Termites can be distinguished from ants by their thick waists and straight antennae.

·         Ants have slender waists and elbowed antennae.

·         Mole young are born in chambers deep underground.

·        
Hang out hummingbird feeders the first of this month. Use a solution of 1 part sugar to 4 parts water. Change the solution frequently to keep if from fermenting. Food coloring is not needed nor is it recommended for the birds.

·         The last week of April is a good time to try an early sowing of warm season crops such as green beans, sweet corn, etc. Transplants of tomatoes, eggplants, peppers, and sweet potatoes can also start being planted outdoors.

·         Container gardening is good choice for flower and vegetable gardening if space is in short supply. It can be done by anyone, anywhere, check it out!!

·         “Natural Gardening” is here to stay………..keep your family safe and check out what organic/natural options are available to you when gardening this year. There are many.


Well, time is running short…see you in the garden,
Sandi Hillermann McDonald

3/18/15

Garden Solutions - March 2015

            March welcomes ‘Spring’, and it will be met with open arms this year!! This is the month to open up the gardens and get things in shape for the new growing season. So, there is plenty that can be done. To name a few; mowing time is upon us; have you sharpened those mower blades? To keep that lawn looking fantastic, it is time to add Fertilizer with Crabgrass Prevention. Make sure to follow directions and do not try to skimp on the amount of product used, so you get great coverage from the Crabgrass Prevention. If you feel you need to over seed, check with the professionals on proper steps for spring treatments.

            Clean up those perennial beds and cut down all Liriope and Ornamental Grasses to about 3-5” above the ground. Once this has been done, it is time to re-mulch your shrub and flower beds. Top-dress these areas with a slow release fertilizer as well, such as Osmocote. Do not put mulch or fertilizer too close to the crowns of plants. You could cause either rot or burning of the plant crown.

            Nesting boxes for Bluebirds and Purple Martin houses should be put out early this month. Purple Martins return to our area between St. Patrick’s Day and the end of the month. So now is the time to be prepared. Are you considering doing some vegetable gardening this year? Well there is no better time than now to start those preparations. You can start seed in the house for plants such as tomatoes, peppers and eggplants. Plant or sow seed for peas, lettuce, radish, kohlrabi, collards, turnips, potatoes, spinach, onion sets, beets, carrots, and parsley outside this month. Set out broccoli, cabbage, brussels sprouts, cauliflower and pansy transplants now. This month is also good to set out strawberries, blueberries, blackberries grapes and other fruiting plants. It is likely we will see an influx of home gardening this year. It can be done in containers on the patio, as square foot gardens, or large plot gardening. There is nothing better than a home grown tomato!! Check out our website for instructions on these items, www/hillermann.com.

            Here is a fun project for the family to try --‘Taters in a Basket’. Have you ever tried growing potatoes in tough clay soil? The results are usually less than bad. However, here is the perfect solution for growing great potatoes. Grow them in a pot. Now, whether you’ve got clay soil, live in an apartment, or don’t have a garden at all, you can grow potatoes the ole’ yard boy way. And that’s in a container. Here is what you will need:

1.      The container, I like to use bushel baskets. They breathe well, allow for good drainage, and they look great! However, any container, plastic, wood or clay will work as long as it has good drainage and is at least 14-18 inches wide and at least 10-12 inches deep.

2.      Soil, soil-less potting mix works best.  Use the good stuff for better results. If you have a compost pile, good compost will work too. Finely shredded is best. People have even used straw and ground leaves.

3.      Fertilizer, an all purpose garden food such as Osmocote is great.

4.      Seed potatoes, these aren’t the ones you buy from the grocery store. They can be found at the garden center and are used specifically for growing potatoes. Do not use potatoes from the produce department at the grocery store; they have been treated with a growth inhibitor to keep them from sprouting.

            Now fill the bottom of your pot with 2-3 inches of soil-less mix or compost. Take a large seed potato, or a couple medium sized, cut up into pieces that contain the eyes, and evenly distribute those on top of the soil-less mix. You can plant 6-8-10 pieces with eyes per basket. If you’re not sure about the ‘eyes’, you can plant whole potatoes, or cut them in half and plant the halves. Cover with another 3-4 inches of soil-less mix, add the fertilizer and water in thoroughly, and place in the sun. Water as needed, thoroughly moistening the soil, then letting it dry before watering again. Once your potatoes start to grow, water regularly, being careful not to over water, which can cause the tubers to rot.

            When your potatoes are growing, you have a couple options: 1) As the potatoes grow, keep adding soil-less mix or compost to the container, keeping about 4 inches of foliage showing. Continue this process until the container is filled to within 1 inch of the top of the basket.  2) Let the foliage grow until it’s approximately 3-4 inches above the basket, and then fill in around the foliage with your soil-less mix or compost unit the basket is full. Now you’re set for growing potatoes! Let your potatoes grow all summer. Don’t forget to keep them fed too. Come late summer or fall when the foliage starts to yellow, cut the foliage off, dump out your soil, and you’ll have a basket full of taters! It is that easy. Good Luck!!

            Now it is time to go, so we will “See you in the garden!”

Sandi Hillermann McDonald