Times are changing and everyone is busier then ever; with kids to coach, meetings to attend and work to do. So “coming” home at the end of a day can be even more important to us then ever. Enjoy daylight savings time and extend your living quarters to your yard and garden. Think of your outdoor spaces as an extension of your home. And in doing so, consider the floor, walls, and ceiling per se. Outdoor firepits, grill and bar centers, rugs, clocks, décor and more are available to add a cozy room effect to outdoor living spaces. Adding resting areas is easy to do…hang a hammock in a tree, set a bistro set in the perennial garden, or put benches in your Hosta beds. Then invite friends over and have a cook out. Let the nature in your yard tickle your senses with the sounds of birds, smells of flowers, sound of running water, and splashes of color. Hardscapes can enhance your outdoor rooms by adding a “floor” to your area of enjoyment.
While you are enjoying your yard, and I hope that you are, here are some items to put onto your gardening checklist. Begin planting summer annuals to add color and spice to the landscape, and don’t just stop with the flowerbeds. There are many new introductions in annuals this year that will prove to be very exciting. One worth mentioning is the “NEW” Potunia. This new Petunia variety is a wonderful filler plant as well as a stand alone plant. It comes in a beautiful “orange” as well as red and yellow and they bloom all season long. It thrives in full to part sun. It has a bold beautiful colors.
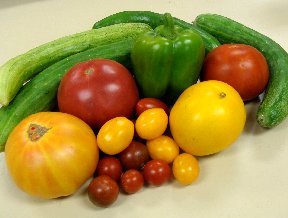
Container gardening continues to be a trendy thing. The many choices, styles, shapes, and colors of containers make great accent pieces for inside or out. Let your imagination soar and express yourself. Use imaginative containers you pick up at flea markets and auction yards. Learn to mix annuals and perennials for great combinations. Try hostas with begonias and impatiens….or hydrangeas with groundcovers. These containers can make great accent pieces on the front porch, the back deck, in a flower bed, around the pool, or at the end of the driveway. And you can rearrange them as often as you wish. No room for a vegetable garden? Try one in a container. You can enjoy fresh tomatoes easily this way.
Take your houseplants outdoors once the evening temperatures will remain above 50`. Move sun loving plants (hibiscus, gardenias, mandevillas, etc.) gradually to sunny locations, as they have not had full sun in your home and will need to be acclimated to those conditions. Check out the many new varieties of tropical plants available this year.
Plant summer bulbs now and fertilize with bone meal or bulb food. Pinch hardy garden mums back now and continue to do so until July 4th to insure proper fall blooming. Treat slugs in your garden with organic diatomaceous earth. This is a powder product, 100% safe, and is good for the treatment of slugs, ants, fleas and ticks outside, as well as roaches and ants indoors. This organic product is very safe to use and a good one to have on hand. “Natural Gardening” with eco-friendly products is a very “trendy” and SAFE thing to do for your own health as well as the environment. Check out the chemical-free options available to you today. Then sit back and watch your kids and pets enjoy the beautiful outdoors.
Insect problems to watch for this month are pine sawflies, aphids, scale crawlers, cucumber beetles, and grubs, to name a few. Permethrin is the chemical product on the market today that is labeled for indoor and outdoor use. Permethrin will kill a large variety of insects on plants, in the soil, and in the home. It comes in many formulations and strengths. See a professional for questions of use of this product.
Other May tips include:
• Pinch azalea and rhododendron blossoms as the flowers fade.
• Fertilize azaleas and rhododendrons with an acid base fertilizer now.
• Don’t remove spring bulb foliage too early or next year’s flower production will decline. Let the foliage die back naturally.
• Plant hardy water lilies now.
• Begin fertilizing annuals now and continue at regular intervals all season long.
• Treat trees with borer problems now with Fertilome Systemic Insecticide Drench.
• Keep bluegrass lawns cut at 3” high, fescue lawns at 3.5” high and zoysia at 2” high.
• Apply post-emergence broadleaf weed controls to the lawn now if needed.
• Begin planting sweet corn, tomato plants, peppers and sweet potatoes as the soil warms up.
• Keep asparagus harvested for continued spear production.
• Remove rhubarb seed stalks as they appear.
• Don’t spray any fruits while in bloom, you may ruin the pollination process.
• Birds eat many insects so attract them to your garden by providing good nesting habitats.
• Herbs planted in average soils need no extra fertilizer. Too much may reduce flavor and
pungency at harvest.
• Watch for fireflies on warm nights. Both adults and larvae are important predators for garden pests.
Until next month,…Enjoy connecting with nature and….see you in the garden….
Sandi Hillermann McDonald
www.hillermann.com