3/6/12

Garden Solutions - March 2012

Spring is almost here!! What a wonderful feeling to be able to spend more time outside enjoying what Mother Nature is unfolding before our eyes. The lengthening of days is a welcome site, and the warm sun on our faces feels great. We “spring forward” with Daylight Savings Time on Sun., March 11 this year. That in itself is exciting.

March welcomes ‘Spring’, and it will be met with open arms!! This is the month to open up the gardens and get things in shape for the new growing season, which means there is plenty that can be done. To name a few; mowing time is upon us; have you sharpened those mower blades? To keep that lawn looking fantastic, it is time to add Fertilizer with Crabgrass Prevention. Make sure to follow directions and do not try to skimp on the amount of product used, so you get great coverage from the Crabgrass Prevention. If you feel you need to over-seed the lawn, check with the professionals on proper steps for spring treatments. Most crabgrass preventers will also prevent new grass seed from germinating.

Clean up those perennial beds and cut down all Liriope and Ornamental Grasses to about 3-5” above the ground. Once this has been done, it is time to re-mulch your shrub and flower beds. Top-dress these areas with a slow release fertilizer as well, such as Osmocote. Do not put mulch or fertilizer too close to the crowns of plants. You could cause either rot or burning of the plant crown.

Nesting boxes for Bluebirds and Purple Martin houses should be put out early this month. Purple Martins return to our area between St. Patrick’s Day and the end of the month. So now is the time to be prepared. Are you considering doing some vegetable gardening this year? Well there is no better time than now to start those preparations. You can start seed in the house for plants such as tomatoes, peppers and eggplants. Plant or sow seed for peas, lettuce, radish, kohlrabi, collards, turnips, potatoes, spinach, onion sets, beets, carrots, and parsley outside this month. Set out broccoli, cabbage, Brussels sprouts, cauliflower and pansy transplants now. This month is also good to set out strawberries, blueberries, blackberries grapes and other fruiting plants. It is likely we will see an influx of home gardening this year because its popularity is growing. It can be done in containers on the patio, as square foot gardens, or large plot gardening. There is nothing better than a home grown tomato!! Check out our website for instructions on these items, www.hillermann.com.

Here is a fun project for the family to try --‘Taters in a Basket’. Have you ever tried growing potatoes in tough clay soil? The results are usually less than bad. However, here is the perfect solution for growing great potatoes. Grow them in a pot. Now, whether you’ve got clay soil, live in an apartment, or don’t have a garden at all, you can grow potatoes the ole’ yard boy way. And that’s in a container.

Here is what you will need:
1. The container, I like to use bushel baskets. They breathe well, allow for good drainage and look great! However, any container, plastic, wood or clay will work as long as it has good drainage and is at least 14-18 inches wide and at least 10-12 inches deep.
2. Soil-less potting mix works best. Use the good stuff for better results. If you have a compost pile, good compost will work too. Finely shredded is best. People have even used straw and ground leaves.
3. An all purpose garden food such as Osmocote is great.
4. Seed potatoes - these aren’t the ones you buy from the grocery store. They can be found at the garden center and are used specifically for growing potatoes. Do not use potatoes from the produce department at the grocery store; they have been treated with a growth inhibitor to keep them from sprouting.

Fill the bottom of your pot with 2-3 inches of soil-less mix or compost. Take a large seed potato, or a couple medium sized, cut up into pieces that contain the eyes, and evenly distribute those on top of the soil-less mix. You can plant 6-8-10 pieces with eyes per basket. If you’re not sure about the ‘eyes’, you can plant whole potatoes, or cut them in half and plant the halves. Cover with another 3-4 inches of soil-less mix, add the fertilizer and water in thoroughly, and place in the sun. Water as needed, thoroughly moistening the soil, then letting it dry before watering again. Once your potatoes start to grow, water regularly, being careful not to over water, which can cause the tubers to rot.

When your potatoes are growing, you have a couple options: 1) As the potatoes grow, keep adding soil-less mix or compost to the container, keeping about 4 inches of foliage showing. Continue this process until the container is filled to within 1 inch of the top of the basket. 2) Let the foliage grow until it’s approximately 3-4 inches above the basket, and then fill in around the foliage with your soil-less mix or compost unit the basket is full. Now you’re set for growing potatoes! Let your potatoes grow all summer. Don’t forget to keep them fed too. Come late summer or fall when the foliage starts to yellow, cut the foliage off, dump out your soil, and you’ll have a basket full of taters! It is that easy. Good Luck!!

Now it is time to go, so we will “See you in the garden!”
Sandi Hillermann McDonald

2/7/12

Garden Solutions - February 2012

Winter care of birds

Now that we are in the throws of winter, and the coldest month of the year is upon us, it is a good time to assess how the birds are doing. This time of year is especially difficult for them. If given a little assistance, their chances of survival are greatly increased.

One of the easiest things to provide, and high on the list of needs, is water. Adding a heater or deicer coil to an existing birdbath, or purchasing a birdbath with the heater built in, can provide the perfect winter oasis for your feathered friends. Just be sure to keep the birdbath clean. Frequent cleaning with a mild bleach and scrub brush and thorough rinsing prior to refilling will ensure a healthy water source.

Providing shelter is another way to help. There is a shortage of nesting sites for cavity-nesting birds due to land development, introduction of competing species like starlings, and the use of pesticides. The use of birdhouses and nesting boxes has helped many species make a comeback. Landscaping that provides shelter can also be a great help. Evergreen trees and shrubs provide a welcome resting place out of the wind, snow or rain. Birds gather in groups towards the inside and huddle together to create more warmth. Placing food and water near these nesting or respite areas allows them to make shorter journeys for these things, which means less time battling the elements and using up their energy reserves. More than 50 species of birds will use birdhouses including Chickadees, Bluebirds, Titmice, Woodpeckers, Wrens, Swallows and Nuthatches.

Requirements for a good bird house are: It must be able to open up for cleaning. Must have ventilation holes in the bottom (these should be plugged up for winter roosting). The houses should have a slanted roof to allow for water runoff, and it should NOT have perches. Cavity-nesting birds do not need them and the perches only allow predator access to the nest.

Placing the birdhouse on a pole will help discourage predators, however, certain species like Chickadees and Woodpeckers, prefer nesting in trees thus attaching the house directly to a tree is what works best for them. The house should face south or southwest so it is facing away from the direction most storms approach. Be sure you have provided a clear flight path to the entrance but approximately 10 feet away from other trees or structures. It should get direct sun for a good part of the day. At the end of the fall, be sure to clean out the old nesting material. Another source of shelter can be provided by your used Christmas tree, particularly if you have few or no other evergreens. Next year, once the holidays are over, take your tree outside and set it up near your house, feeder or winterized birdbath.

The final piece of the puzzle is providing food. Particularly here in Missouri, winter is a difficult time for the bird species that have chosen to overwinter here. The days are short and cold. There is little to no vegetation, and most of the insects are dead or dormant. Now is an excellent time to purchase a feeder if you do not already have one. Most songbirds feed on insects and spiders during the spring and summer, however, the non-migratory species switch to fruit and seeds in the fall and winter. Black oil sunflower seeds are preferred by the largest number of bird species. Not only are these seeds very nutritious and high in fat, but their small size makes them easier for smaller species to split them open. Be sure to scatter some seed on the ground and beneath trees and shrubs for birds that prefer to feed in these locations. Feeders with platforms provide the right type of feeding station for species that do not perch, such as Cardinals. High-energy food, like suet and peanut butter, are an added benefit for all birds and provide much needed fat. So I hope now you enjoy the antics of our feathered friends.

Until next month,
Sandi Hillermann McDonald

1/1/12

Garden Solutions - January 2012

LET’S TALK BIRDS AND TERRARIUMS….

There is only 80 days until spring! FOR BIRDS, a combination of sleet and deep snow makes many food sources impossible to reach. In normal winter conditions, most birds have ways of coping with the cold. To help survive cold nights, Chickadees can lower their normal 108-degree body temperature by 12-15 degrees to conserve energy. By dawn, they, like many birds, will quickly dart to a food source to fill their empty stomachs. That’s why early morning and late evenings are some of the ‘largest crowds’ at bird feeders.

Feed the birds hi-energy foods like black oil sunflower seeds, tree nut pieces and suet, which give birds more energy per ounce consumed. One need of wild birds often overlooked by consumers in cold weather is the need for ‘open water.’ The main reason they need water is to help keep warm. Birds fluff out their feathers so they can better capture a ‘layer of air’ that acts as heated insulation. Matted, dirty feathers can’t be fluffed out. Therefore, by offering food and water, dozens of your feathered friends will soon add brilliant flashes of red and blue, gray and white, across the snow, and you’ll hear their melodious songs as the sing “Thanks” to you for helping them survive.

TERRARIUMS, a great way to satisfy your green thumb during the winter is to tackle a classic indoor gardening project: terrariums. I have a terrarium that has thrived for months with low light and no additional water. It's not so much a miracle as it is the science of nature. The plants inside the terrarium create their own mini climate, transpiring water vapor that condenses on the glass and then flows back into the soil. Science aside, I find a terrarium fascinating to look at, like a miniature landscape in a jar. Speaking of miniatures, decorating these mini gardens are even more fun to do.

Don't be intimidated by the process of building a terrarium. Materials needed include a wide-mouth glass container, potting soil, small plants, pea gravel, and charcoal. For easy access, an apothecary jar with a glass top is a great choice. If your container does not have a lid, you can cover it with clear plastic wrap, a piece of Plexiglas or a sheet of glass. Leaving it open is another option, but watering needs will vary.

To avoid insect and disease problems, wash the gravel and use top-quality, sterile potting soil. Fill the bottom of the container with about ½”-1 inch of gravel. Next add about ½” to ¾’of charcoal, this helps keep the soil sweet and not sour, which can cause disease. Top the charcoal with 3 inches of soil. Now comes the fun part: planting the “landscape”. Select varieties of plants that all have the same growing needs when it comes to light, water and humidity. Slow growers with small leaves are best suited.

Remove the plants from their pots and plant them in the terrarium just like you would in the garden. Place the taller plants in the back, mid-size plants in the middle, and low-growing things like moss toward the front. If possible, keep the foliage away from the sides of the container. Once you have the plants in place, moisten the soil lightly and put the lid in place. How often you will need to water your terrarium depends on how tightly the lid fits. A loose-fitting lid lets moisture escape. A good indication of when to water is whether there is condensation on the glass. If there is no condensation, water the soil very lightly. If there is heavy condensation, remove the lid to allow the terrarium to air out.

The neat thing about terrariums is that you are only limited by your imagination. Add large rocks to represent craggy mountains or small mirrors for ponds. You can even create a desert landscape with succulents and cacti. Or make a mini landscape with pathways and furniture! So try your luck at indoor gardening this month! It will make every day feel like spring.

Until next month, Sandi Hillermann McDonald

12/6/11

Garden Solutions - December 2011

The month of December brings the holiday season and warm thoughts of family, friends and community. I would like to say “Thank You” and I wish you and yours a “Blessed Holiday Season” with all the best in the New Year! Furthermore, fall will turn into winter this month. With the addition of fire pits in our outdoor rooms, evenings outdoors can still be enjoyable sampling hot chocolate or cider with friends around the blaze of a comfortable warm fire. You can even gather the kids for the making of s’mores! Enjoy the crisp cool weather.
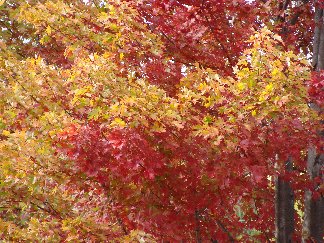
It may not always be the most comfortable time to be planting anything in your landscape, but it is a great time for the plants. Trees and shrubs are completely dormant now, so the concept of transplant shock does not apply. However, you do need to treat any new plantings the same now as you would if it were the middle of summer. New plantings need to be thoroughly watered in regardless of the weather conditions. If it is below freezing but the ground is not frozen, go ahead and plant, taking care to backfill the hole with as loose a soil mix as you can. As soon as the temperatures are back, above freezing go back to your new plantings and water them in. If you have spring bulbs that you have not planted in the ground yet, you need to make that a priority. A little bone or blood meal placed over the planting areas will help keep the squirrels away from your bulbs. They are also great additives for your bulbs.

Leaf removal is the next task. I had all of the leaves collected out of my yard a week ago, only to see a lot of my neighbors leaves come to visit my yard, with the help of the wind we have had. The point I am trying to make is that leaf removal is an ongoing task. Composted or mulched leaves are great as flower bed coverings for winter and a wonderful addition to your compost piles. So recycle your leaf collections and put them to good work in the garden!

Trimming or pruning of some of your trees and shrubs can be done at this time. Basically it breaks down like this, if the tree or shrub flowers before the 1st of June don’t touch it now. If it flowers after the 1st of June, you can safely cut it now. Resist the urge to cut back everything. Most perennials benefit from a layer of mulched dead leaves. If you had any fungus or disease problems in an area, go ahead and cut back the plants in that area and rake up the debris. Mulch any plants that need extra protection, like those hardy banana trees! Keep your ornamental grasses up until mid-March (I’ll let you know when it’s time to cut them back).

Roses: a winter “hair-cut” can be given, but don’t cut them back all the way. Some winters can be so cold that the roses could get winter die-back which would need to be removed in the spring anyway, so plant on your heaviest rose trimming in spring around the first of April. Apply a thick layer (10-12”) of mulch at the base of your roses now.

Lawns: It is still a great time to apply a Winterizer fertilizer to the lawn. This fertilizer will help keep your cool season turf greener, even in the coldest part of the year.

Plants get “chapped lips” too. Cold, dry winter winds and bright winter sun make our skin chapped and unhealthy. Those winds have a similar devastating effect on your plants, which are out in the winds all winter. No wonder your evergreens don’t look so great come spring. This drying effect is called desiccation and is often the most devastating aspect of winter damage on plants in our Midwest region. To fight desiccation, first choose the right plants for windy, dry areas. Especially try to avoid placing broadleaf evergreens, such as azaleas, in places shady in summer but sunny and windy in winter. Second, make sure to water your evergreens well through early December, before the ground freezes and plants cannot “drink” from the soil. Third, mulch your plants for winter to retain soil moisture as well as soil temperature. Fourth, use an anti-desiccant. These products coat leaves and needles to slow down the loss of moisture. One of the best products to use is Wilt Stop by Bonide. This product is a natural polymer that covers plants with a FLEXIBLE coating to lock moisture in the plant tissue. The flexible coating is important to keep on the plants through winter as they bend and sway in the wind. Wilt Stop lasts 45-60 days so apply the first treatment in early December and again in early February.

Here are a few tips on winter houseplant care. When the heat goes on and the daylight becomes shorter, houseplants sometimes begin to yellow and drop their leaves. It may be necessary to move the plants to a different place in the home and to give them different treatment from that given during the summer. Flowering plants need at least half a day of direct sunlight to develop flower buds. Cacti and many succulents require a sunny location, and coleus and crotons need direct sun to maintain the decorative color. The ideal temperatures for foliage plants are 68-70 degrees during the day and slightly lower at night. Flowering plants retain blossoms longer at lower temps. Remember, windowsill locations are much colder during the winter and plants may need to be moved to prevent getting chilled. The amount of water the houseplants need declines during winter, so increase the amount of time between watering. Reduce fertilizing as well: flowering plants should be fertilized half as often and foliage plants should only be fertilized if needed.

Some of the plants in your landscape can help you decorate for the Christmas season as you prune them for next year. Holly and Boxwood can be trimmed now with some of the cuttings used to accent wreaths or live indoor plants. And, some of the inside growth of evergreens such as White Pine, Norway Spruce, Blue Spruce, even some of the seed heads of ornamental grassed can be used to make a harvest wreath or basket for your front door or porch. Talk about recycling! After Christmas, you can take them to your compost bin and make them future fertilizer! Along with these Holiday tips, here are a few other ideas for the month:

• Use caution when spreading salt or calcium on ice or snow packed walks or driveways. Salt can damage lawns and plantings, calcium is much safer to use. Be sure to designate areas to for piling snow from plowing in advance to prevent damage to trees, shrubs and lawns.
• Continue to feed our fine feathered friends and place heated birdbaths with fresh water out for them.
One last task is to remember your tools. Steel and wood don’t like dirt and water. Keep them clean and well oiled and they will serve you for years to come. And gasoline powered tools should also be serviced according to the manufacturers specifications so that they will start for you on the first pull next year.

Again, I wish you and your family a very Blessed Christmas season. Let’s get to work on planning that beautiful garden scene for next year!

See you in the Garden…………..
Sandi Hillermann Mcdonald

10/27/11

Garden Solutions - November 2011

Water is the word of the month!! It is imperative to water your trees & shrubs, especially new plantings. Our fall season has been very dry - following a record heat summer. Even though the foliage is gone, the roots need moisture to build up spring buds and increase root growth. The amount of water needed may be less than when the foliage was on the plants, but water is still very important.

It is sad to watch the garden fading into winter, but at least we don’t have to say goodbye. Spring will return, as naturally as the sun will rise tomorrow morning. All we have to do is get the garden prepped so that it can rest until its renewal a few months from now. Here is a to-do list that will help you prepare your garden for its winter’s nap.

Clean out and cut back. Loads of dead leaves and rotten stalks on plants can harbor disease, even through the winter season. But, don’t cut all your plants back to the ground, and don’t pick up every leaf. It is a great treat to leave some seed heads on plants for the winter birds and ornamental grasses for their winter art in the garden. Leaving some plant stalks to protect the crowns of tender perennials is also beneficial.

Cover up. Mulch is the best winter protection for your plants. Wood mulch is the most common. Mulched leaves will also work. Wait until the ground has frozen slightly, usually around Thanksgiving for us, to ensure the plants are in their dormancy state. If the snow falls before you get the opportunity to get the job done, mulch over the snow. Some woody perennials and shrubs may benefit from soil mounded around the base. These plants, in our area include, roses, crape myrtle, butterfly bushes to name a few. Tender shrubs may need to be screened or wrapped with burlap or something similar, not plastic.

Dig in. There is still time to plant some garden jewels this month. Trees, shrubs and plants that have a root ball larger than a gallon can be put into the ground. In addition, now is the time to plant those spring beauties we call bulbs. To enjoy the beauty and bright colors of tulips, hyacinths, and daffodils as well as crocus and alliums, plant them NOW. Bulbs need 10-12 weeks of cold soil temperatures. Therefore, in our area you can plant up to the Christmas season, as long as frost hasn’t built up in the soil.

Write down. You will find that a garden log or journal will be very helpful next spring when you’re trying to identify those first tentative green shoots and wondering whether you divided that Hosta plant last fall or should you do it now. Draw a basic diagram of each bed, noting the plants and adding photos where you can. A little extra effort with your journal will pay off next spring.

Here are a few other duties to think about this month of November. Continue mowing lawn grasses as long as they keep growing, 3” is a good height. Apply Winterizer fertilizer to lawns to strengthen plant stems and roots for winter growth and early spring green up.

Cover garden ponds with bird or pond netting to prevent leaves from fouling the water. Oxygen depletion from rotting organic matter can cause a winterkill of pond fish. Take steps to prevent garden ponds from freezing solid in winter. Using a floating garden heater in the pond will lessen the chance of ice damage.

Set up bird feeders. Birds also appreciate a source of unfrozen drinking water during the winter. Use one of the many styles of birdbath heaters or heated birdbaths available at garden centers. When feeding the birds, set up a variety of feeder types to get the best assortment of birds to come to your yard. Tube feeders are good for songbirds, platform feeders are good for cardinals and larger birds, and suet is a great source of fat and energy for woodpeckers and all bird types.

Enjoy the antics of wildlife and the beauty of plant art in the garden during this upcoming winter season. I will give you more to look forward to in the winter garden in December. Until then, Happy Thanksgiving to all and enjoy the outdoors as much as possible.

See you in the garden,
Sandi Hillermann McDonald